Table of Contents
HDHomeRun for Roku
Your Roku needs to have a reliable internet connection, either via wired ethernet or a strong wireless connection (preferably using WiFi 5 or later, using the 5GHz band). The app does not work outside of your home network, and the Roku needs to be connected to the same local network as HDHomeRun tuner.
Install the app
Download the app
- Press the Home button on your Roku remote and then scroll down to the “Search” option.
- Start to type in “HDHomeRun” using the on-screen keyboard. Normally you only need the first few letters, and the green HDHomeRun app icon should start to show up. When you see the green HDHomeRun icon, scroll to the left and select it.
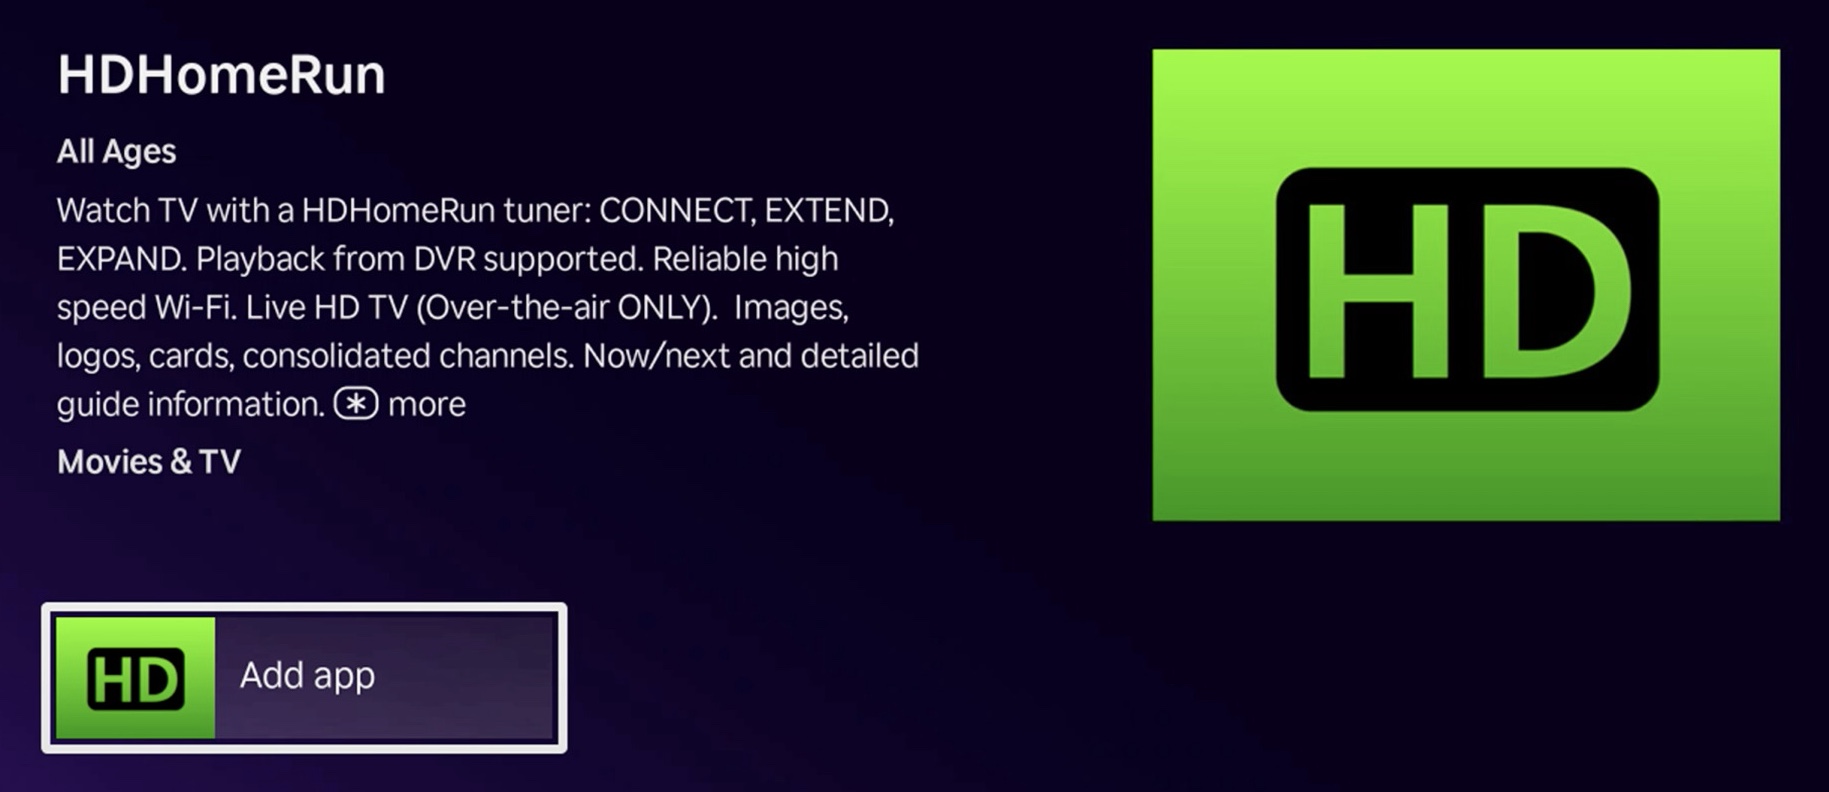
- Select the “Add app” option and wait for the installation to complete. You can open the HDHomeRun app once done, or you can go to the home screen and open the HDHomeRun app from there.
Launch the app
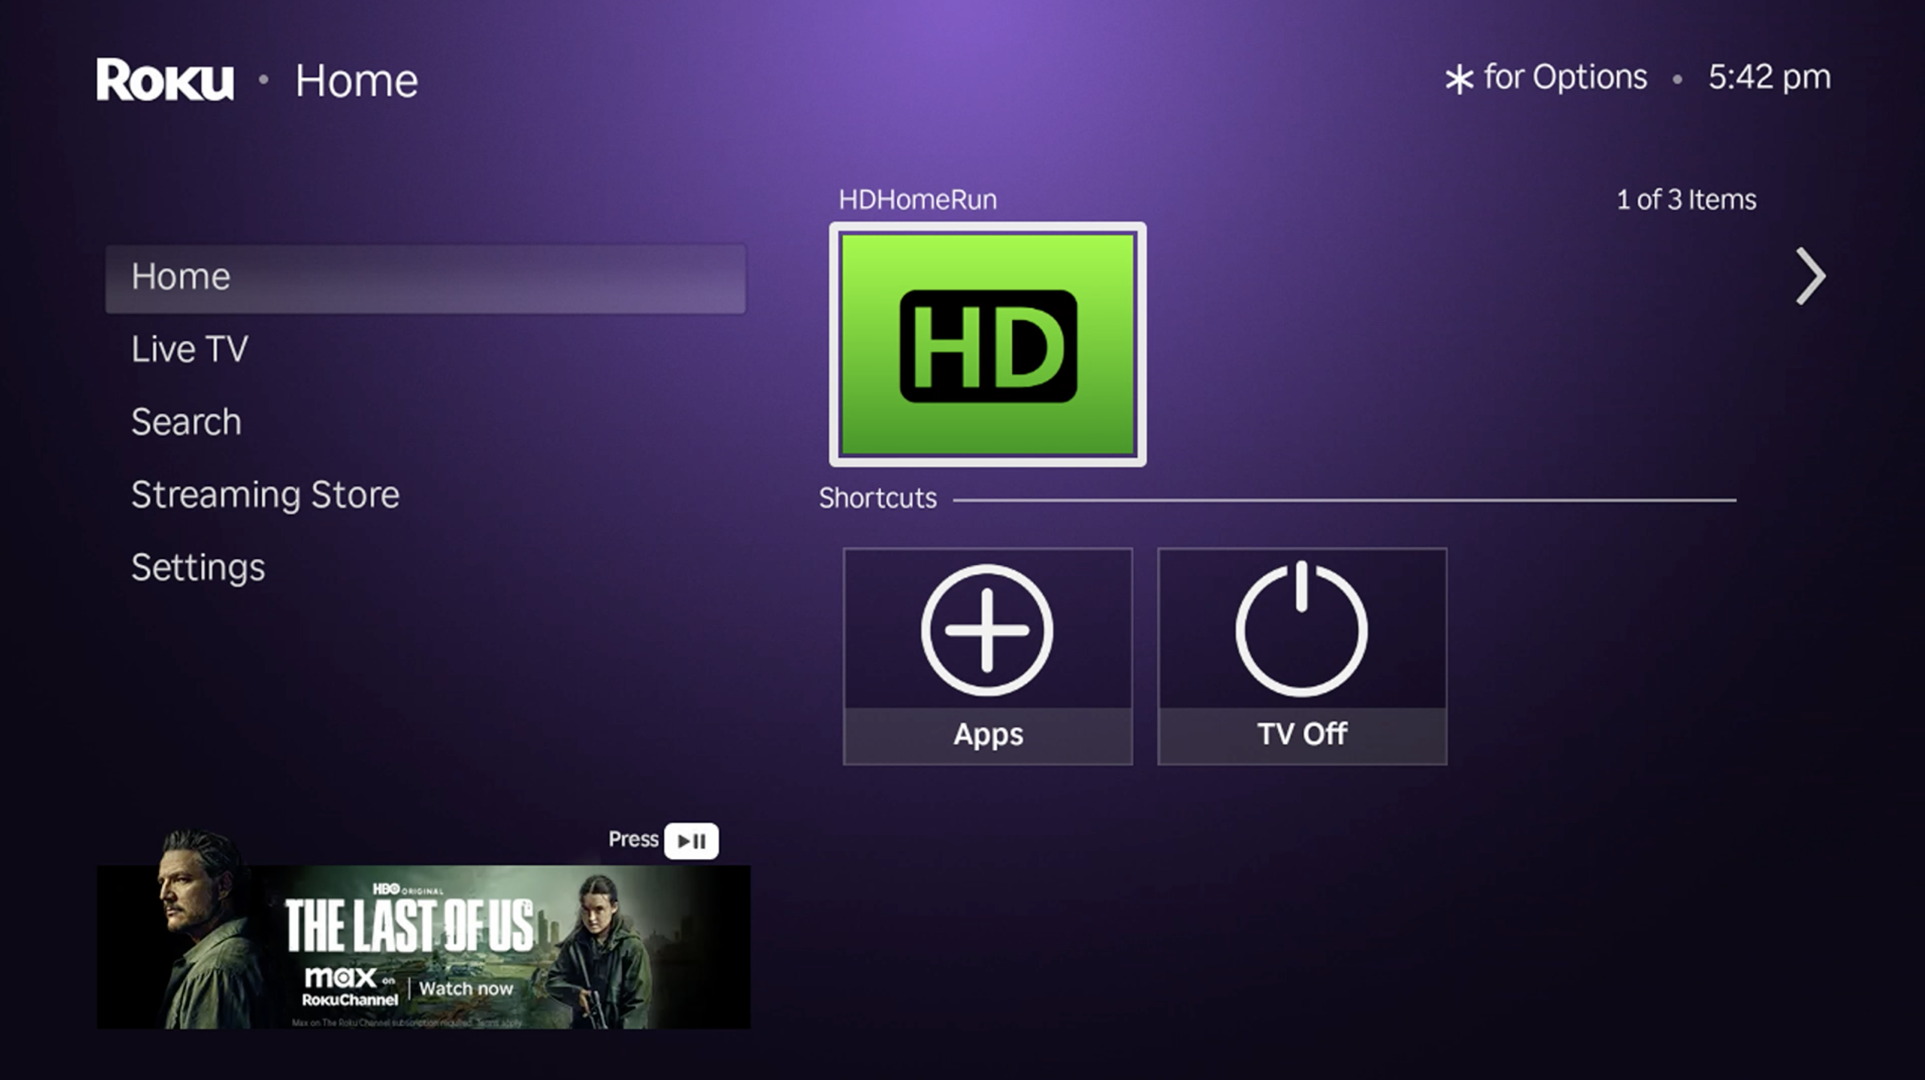 The HDHomeRun app icon will show up under the “Home” option on the home screen, next to any other apps you have installed.
Scan for channels
The HDHomeRun will attempt to automatically scan for channels the first time it is connected to power, and will occasionally do a background scan every few days, but you may still need to run an initial channel scan.
- Scan for channels using the web interface:
- In a web browser that is on the same local network as the HDHomeRun (your PC, phone, tablet, etc), go to this address: http://hdhomerun.local/lineup.html
- Click on “Detect Channels”
- You can also hide or “Favorite” channels from this page. Click the gray star next to a channel number once to make it a “Favorite”, then click it again to “Blacklist” the channel from the HDHomeRun app. Click again if you wish to return a channel to the default gray star (no setting).
Basic controls
- While no controls are visible on screen (Press back/exit/escape to clear visible controls from the screen):
- UP / Down - Opens the right-hand Slice Guide for channel changes (or the grid guide if you disable the Slice Guide in settings)
- While in recording playback, UP / Down will seek in 10 minute steps
- LEFT / RIGHT - Seeks when viewing a recording or when you have paused live TV and have a buffer to rewind and fast forward through
- SELECT - Brings up the action bar with “Play/Pause” selected, so that you can press “Select” twice to quickly play or pause. From here you can navigate to the other action bar buttons.
- BACK - Exits to the Recorded/Discover/Tasks/Settings screens
Troubleshooting
No audio
Some Roku models pass the audio through to the television to decode. This is supported by almost all televisions but must be configured on the Roku and/or Television.
1) Volume mode setting:
- Go into Live TV such that video is playing
- Press the * button and set “Volume mode” to “off”
2) Roku audio settings:
- Go to the Roku home screen
- Then navigate to “Settings” → “Audio”
- Select “Streaming audio format” and change it to “Dolby”
- Go back to Audio and select “Digital output format”
- and change “Digital output format” mode to “Custom” → “Dolby” → “Dolby Digital”
3) Television audio settings:
- Check that Dolby Digital audio is enabled on the HDMI input.
If you still cannot get audio to work, please open a Support ticket and we will help you.
ATSC 3.0
- The following models support ATSC 3.0 content:
- Roku Ultra 4850 (released 2024)
- Roku Ultra 4802 (released 2021)
- Roku Ultra 4800 (released 2020)
- Select Roku televisions
- Older Roku models, non-Ultra models, and LT models do not support playing ATSC 3.0 channels.
- DRM-restricted ATSC 3.0 channel support is being worked on and is not yet supported.
Playback stops often
- 4 Hour timeout - By default Roku will stop playing after 4 hours without user interaction. This affects all apps. From the Roku home screen go into
- → Settings
- → Network
- → Bandwidth saver
- Turn this option “Off”