This is an old revision of the document!
my.HDHomeRun.com
 While connected to the same local network as your HDHomeRun, open a web browser to http://my.hdhomerun.com
my.HDHomeRun.com is there to configure your device. You can update the latest firmware, set your preferences, perform channel scans, and activate your DVR service from here.
Some web browsers, such as Microsoft Edge, do not work correctly with the my.hdhomerun.com web page. You may need to use a browser such as FireFox or Chrome to use the site.
The top level includes links to your Shop account, where you can manage service subscriptions and buy hardware, as well as a link to Support.
The next level is a series of 2 tabs: Live TV and DVR. The Live TV tab provides instructions for setting up Live TV on all major devices. The DVR tab provides instructions for setting up DVR on all major devices.
Below these tabs are a series of white boxes that list your available HDHomeRun products on the local network.
HDHomeRun device boxes


Each white “device” box includes a title and a version number, indicating how up to date the software is it's running. You may be occasionally asked to update your firmware. You can do so by clicking that version number and an update guide will show.
If your white device box is for your DVR software, it will simply show a title and version number. If it is for an HDHomeRun hardware device, like a CONNECT or EXTEND, it will also list all available channels. If you click the channel list, you will be sent to a page that allows you to manually rescan your channels (usually not necessary). From here you can also favorite them by clicking the star once, which ensures the DVR will use that channel first when recording, or disable them by clicking the star twice, which will make them disappear from the HDHomeRun software and the DVR will completely ignore them.
Finally, if you have an EXTEND, you will have a link for Transcode Configuration. If you click that link, you can manually force the amount of transcoding that you see in your HDHomeRun app.
Device menu
Channel lineup
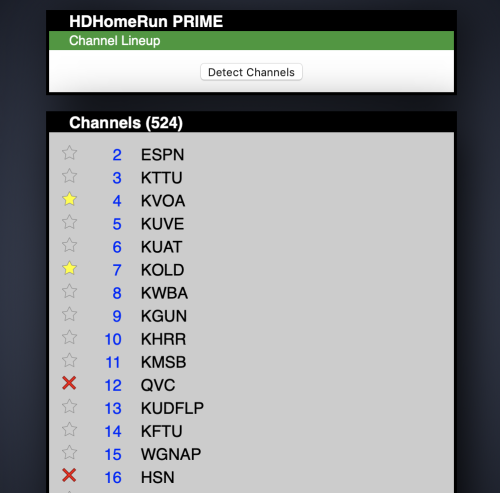 The channel lineup will allow you to force the HDHomeRun to rescan for channels, as well as mark channels as favorites or hide channels completely.
To get to the channel lineup:
- Go to http://my.hdhomerun.com while connected to the same local network as your HDHomeRun hardware.
- Click on the channel list link (normally the second line, under the version number).
Rescanning channel list:
- Click on the “Detect Channels” button to force a rescan. The HDHomeRun will also attempt to scan channels when it powers up, as well as doing periodic updates in the background to look for new channels.
- If your tuner supports more than one TV standard, you will be able to choose that before scanning.
Favorites or hiding channels:
- Channels can be marked as favorites or hidden from the HDHomeRun app and from certain third party apps:
- Click the star icon next to a channel once to “favorite”. Favorites will show up when using UPnP/DLNA, but are not currently used in the HDHomeRun app.
- Click the star icon a second time to turn it into an X to hide a channel.
- If you want to make the channel visible again, click on the icon a third time to take it back to the default (neither favored or hidden).
If you change the channel lineup and are using a DVR storage device (with a HDHomeRun DVR subscription), you may want to reboot the storage device in order to force it to update the new channel list, rather than waiting for the two to sync.